How to Add Elements in Windows Movie Maker?

When editing videos, many people like to add elements to increase the interest of the video.So, how to add elements in Windows Movie Maker? With regard to this problem, I believe that after reading this tutorial, you will learn how to operate it easily.
Step 1: Import the video you need to edit.
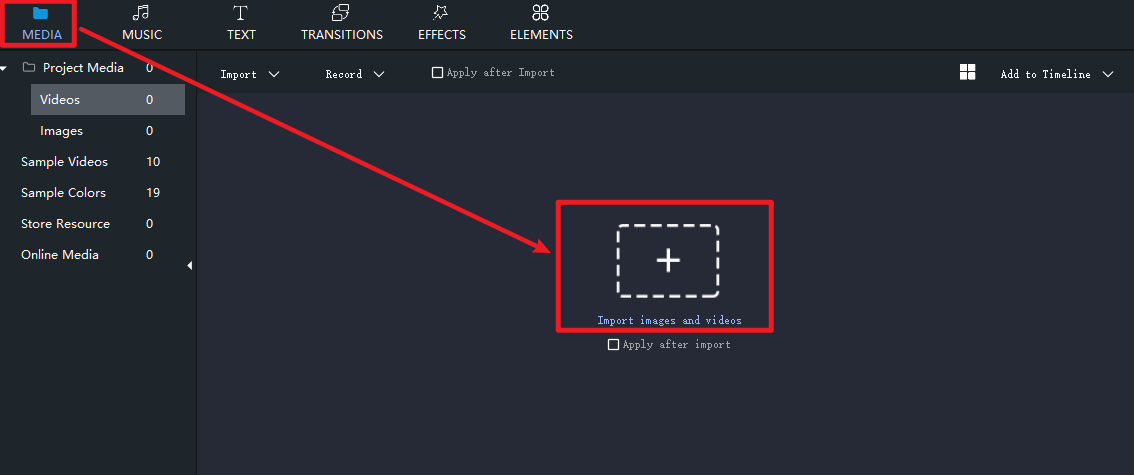
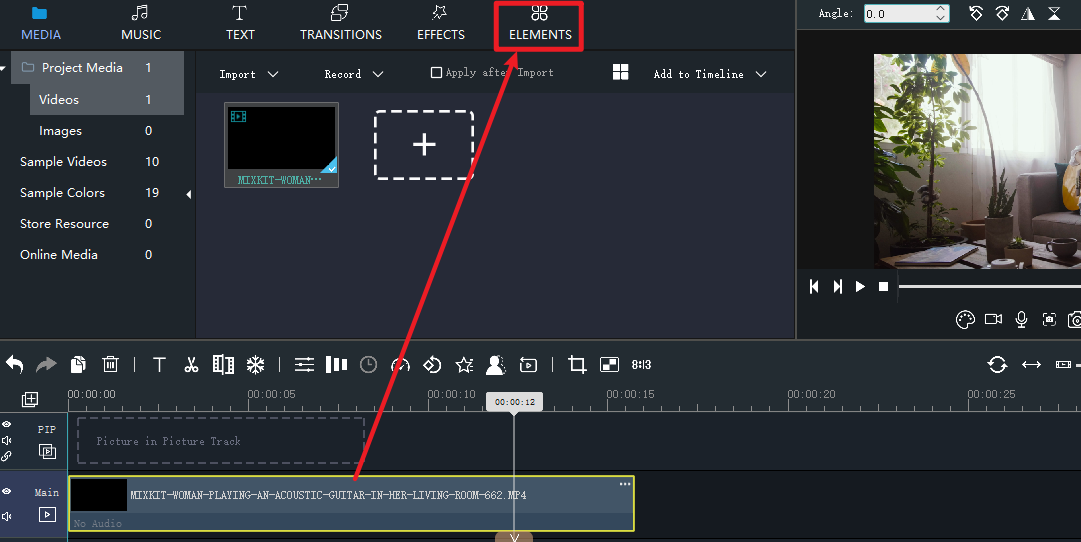
Step 2: Adding elements.
Click the "ELEMENTS" button.
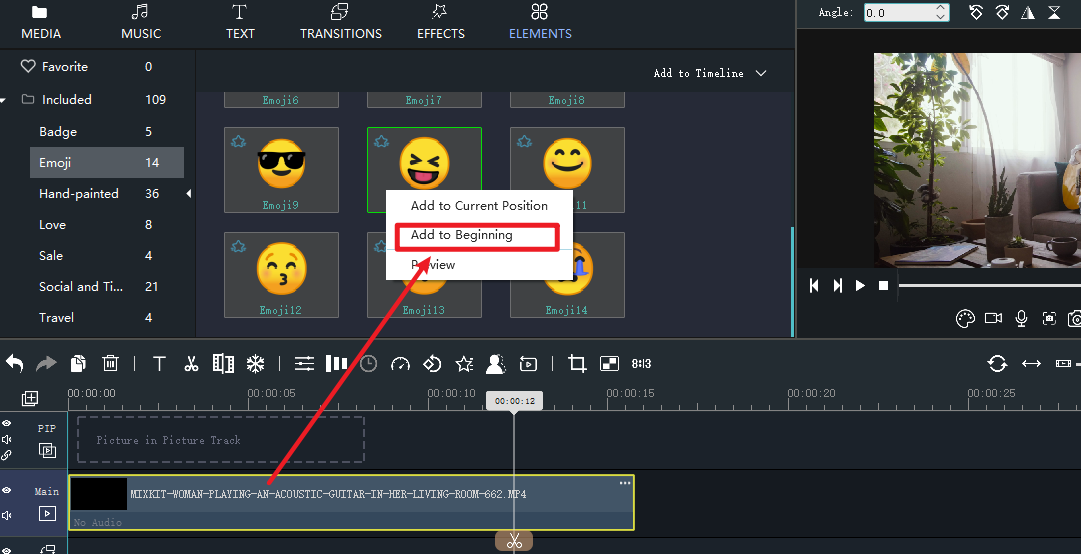
Step 3: Select the elements.
Select an element you want, and select "Add to Beginning".
Step 4: Adjusting the duration.
Drag the right edge of the frame with the left mouse button to change the duration required.

Step 5: Adjust size, position, and rotation.
Drag the button to the left to zoom in or out of the element.
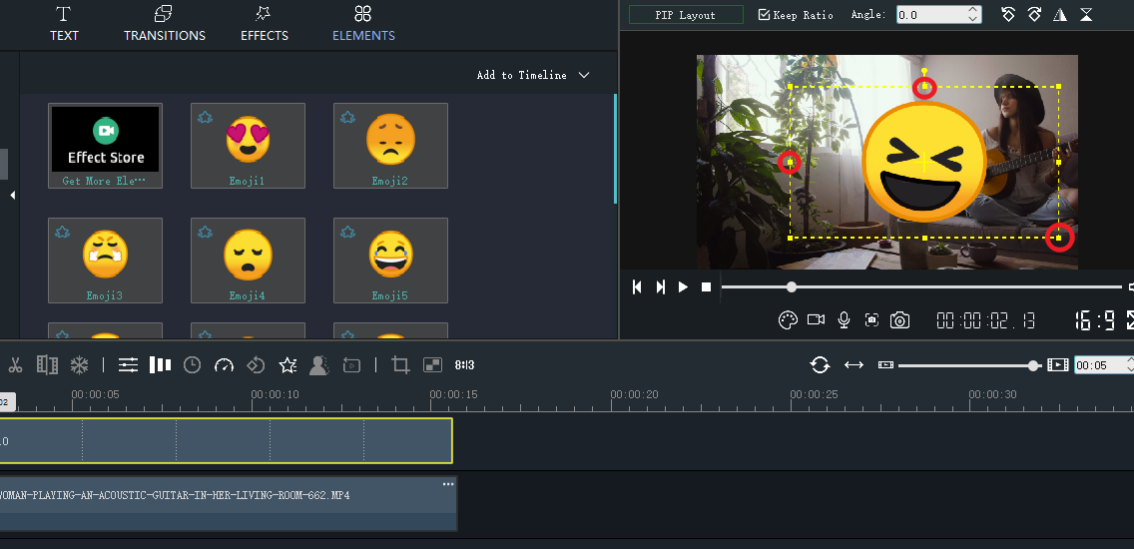
Use the left mouse button to move the yellow box to the desired position.
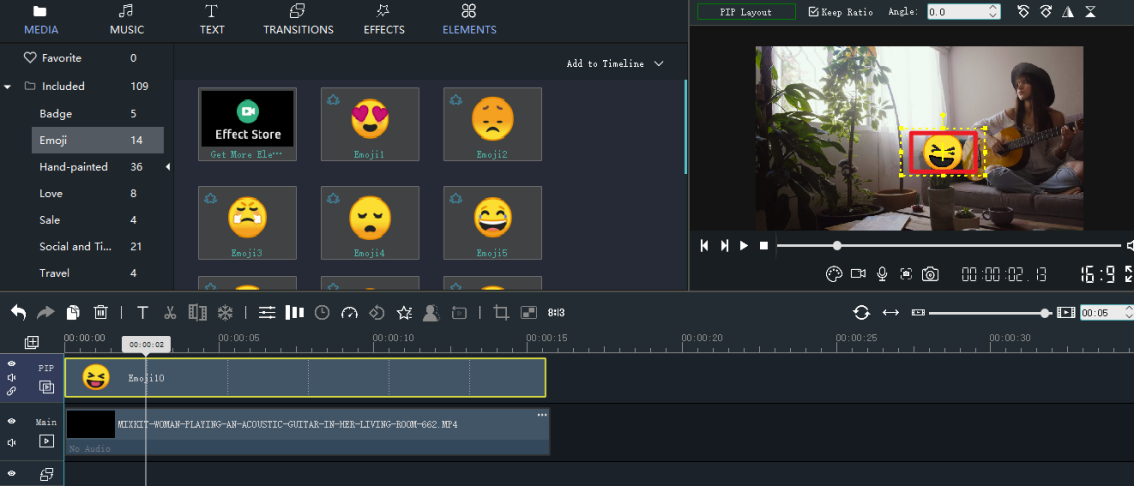
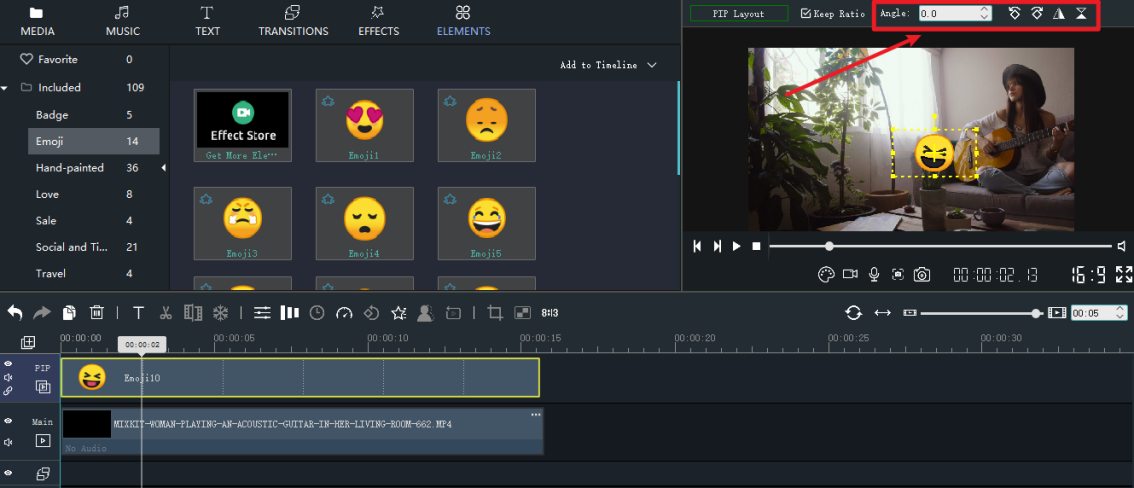
You can rotate the angle you want, and at the same time, you can "Rotate Left 90", "Rotate Right 90", "Flip Horizontal" and "Flip Vertical" according to your own needs.
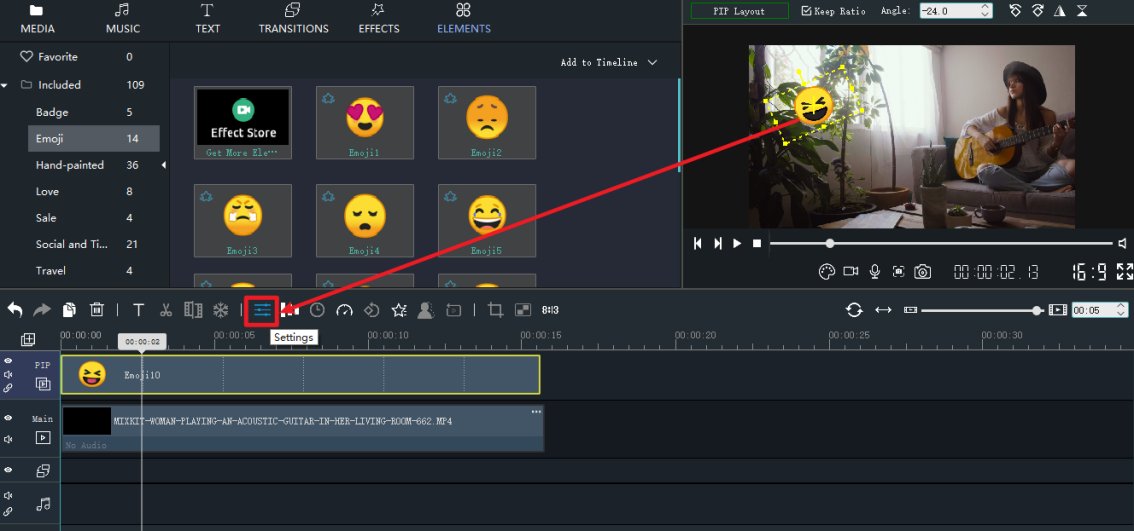
Step 6: Edit elements.
Click on the "Settings" icon.
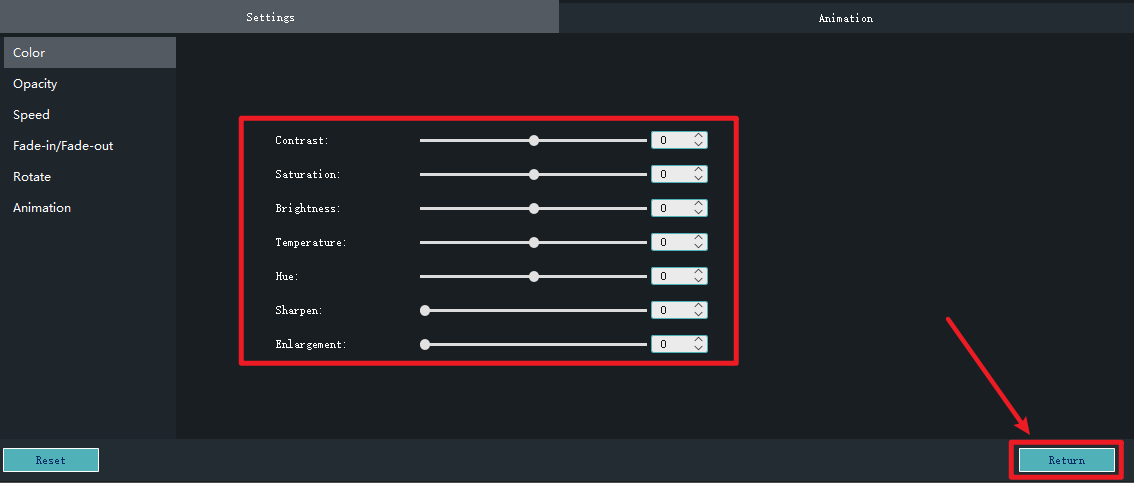
Drag the slider to adjust to the required parameters.
Then, don't forget to click the "Return" button.
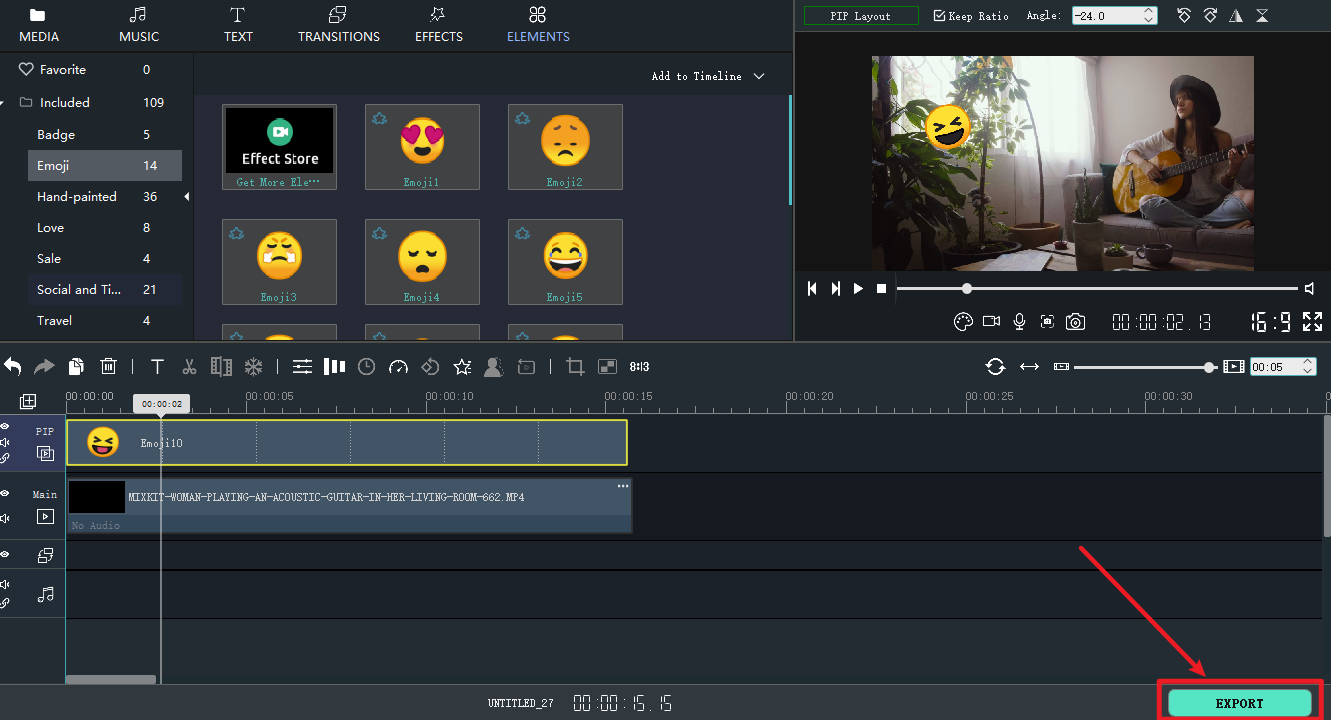
Step 7: Export the edited video.
After reading this tutorial, I believe you have learned how to operate.So, download the latest version of Windows Movie Maker through the following official link and try it.


