How to Make a Video File Smaller

The most effective and direct way to make the video smaller is to trim it. Trimming the video can reduce the size of the video to save space, and at the same time, unnecessary video clips can be deleted at will. Although removing the audio from the video and converting different video formats has a certain impact on the video size, it is limited by certain circumstances, such as the specified video upload format.
Therefore, the following steps may help you to eliminate your worries when editing videos using Windows Movie Maker.
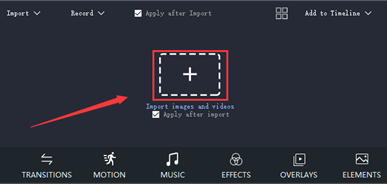
Step 1: Import the video
First of all, click "+" to import the video and it can be placed on the main timeline spontaneously.
Or you can directly drag it to the timeline.
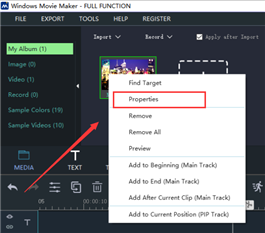
After that, you can right-click the video and choose "Properties" to view the size of the video.

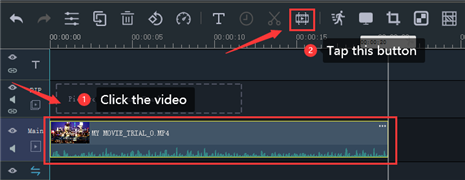
Step 2: Trim the video
Then pitch on the audio and tap the "Trim" button in the toolbar above the timeline.
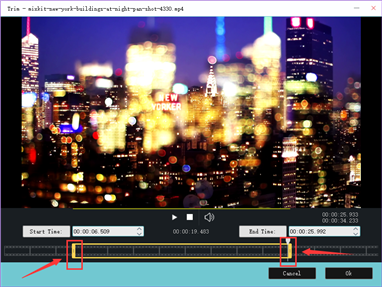
Besides, you should drag two yellow sliders respectively to decide the starting and ending point.

Or you can fill the exact the starting time and the ending time to keep the clips you need.
Step 3: Remove Audio
If your video clip include the audio file, you can right-click the video clip and select "Remove Audio" to save the file size.

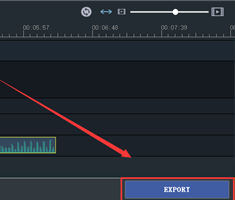
Step 4: Export
Finally, click the "Export" button at the bottom right after you finish editing the video.
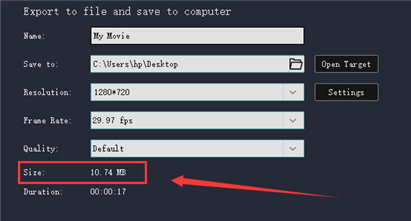
Click the "Settings" button to adjust the Video and audio parameters, or use 3 different output setting formats.

And you can see the size of the video after trimming.
I think it's easier for you to trim the video in Windows Movie Maker even if you're a novice. So, let's download the latest version of Windows Movie Maker through the following official link and try it.